Understanding the Types of Mining

Now
that we understand what bitcoins are from the last post Understanding Bitcoins. Now have a wallet set up to store
them, and have made a small amount of bitcoins to test our wallet, we're
set to start making some real amounts of bitcoins.
The way we do this is by mining for them. Mining is a way of verifying bitcoin transactions made by other people in return for new bitcoins (given right to your wallet).
There are two main types of mining: solo and pool. Solo mining is done on your own. With the hardware of an everyday person, it would take years to get earn acutal bitcoins. But once you succeed, you get 50 bitcoins (worth about 15,000 US dollars). This takes too long, so in this tutorial, we are not going to cover this method.
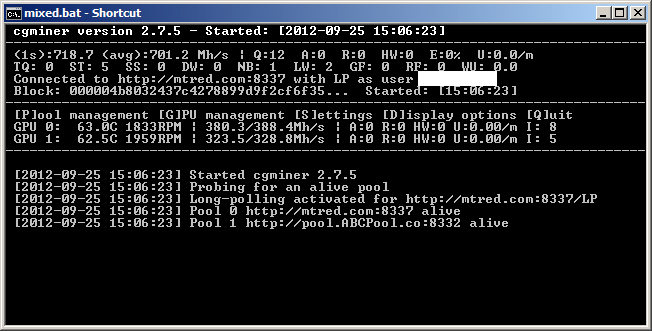
The method we are going to use is called pool mining. It involves signing up for an account with any one of many different companies. Using their own software and hardware, they group together the mining efforts of lots of people's computers. Every person gets a small number of bitcoins (quite often decimals of a bitcoin). As a person with a modest computer, this is the only way to go.
 The quickest and most user friendly wallet to setup is CoinBase.
It works much like PayPal and allows you to Send/Receive BitCoin
payments as well as Buy/Sell BitCoins. Start by setting up an account HERE.
The quickest and most user friendly wallet to setup is CoinBase.
It works much like PayPal and allows you to Send/Receive BitCoin
payments as well as Buy/Sell BitCoins. Start by setting up an account HERE.
Their site is perfect for those new to BitCoin and not too into the technically side but rather looking for a quick and easy setup.
Once you're signed up,
1. Click Account Settings on the LEFT side bar.
2. Click BitCoin Address at the top menu.
3. Click the + Create New BitCoin Address button.
You'll see a new BitCoin address pop up below.
It will look something like this: 1KHPYQMnHxFoUGK2bCfKFtEuLtH88PYPXG
Select that text and copy it to your clipboard.


The way we do this is by mining for them. Mining is a way of verifying bitcoin transactions made by other people in return for new bitcoins (given right to your wallet).
There are two main types of mining: solo and pool. Solo mining is done on your own. With the hardware of an everyday person, it would take years to get earn acutal bitcoins. But once you succeed, you get 50 bitcoins (worth about 15,000 US dollars). This takes too long, so in this tutorial, we are not going to cover this method.
The method we are going to use is called pool mining. It involves signing up for an account with any one of many different companies. Using their own software and hardware, they group together the mining efforts of lots of people's computers. Every person gets a small number of bitcoins (quite often decimals of a bitcoin). As a person with a modest computer, this is the only way to go.
Step 1: First Get a BitCoin Wallet
Their site is perfect for those new to BitCoin and not too into the technically side but rather looking for a quick and easy setup.
Once you're signed up,
1. Click Account Settings on the LEFT side bar.
2. Click BitCoin Address at the top menu.
3. Click the + Create New BitCoin Address button.
You'll see a new BitCoin address pop up below.
It will look something like this: 1KHPYQMnHxFoUGK2bCfKFtEuLtH88PYPXG
Select that text and copy it to your clipboard.
Step 2: Setting up a Mining Account


After
trying a few different mining pools, the one that I really liked was
BitMinter. It is, by far, the easiest to use. It comes with its own
software, making things so much easier. Below are the few parts that
involve the creation and setup of your account.
1) Open up a web browser and navigate to the BitMinter log in (https://bitminter.com/login).
2) Choose your account you'd like to link with BitMinter. Log in with this account. BitMinter uses a log in service called OpenID, which is a futuristic way of logging in with an already-existing account to eliminate the need to remember yet another password.
3) Set the main settings as according to the picture:
- Set your email address.
- Set your auto cash out threshold to a reasonable amount. Mine is set to 1 BTC (approx. $400). This means that when I mine 1 BTC, I will receive it into my bitcoin wallet, just like the test, but with a higher number of bitcoins.
- Set your "Pay to address" to the wallet address you receive on Coinbase. This is the address that all of your bitcoins are sent to, in case you haven't figured that out yet.
Step 3: Setting up the Workers

Each
computer needs its own worker to connect to on the BitMinter server.
The software (in the next step) on each computer will each be set up to a
different worker so that the BitMinter server doesn't have trouble
transmitting and receiving mining work.
While still logged into the BitMinter website, hover over "My Account" at the top of the page. Then click on "Workers".
Near the bottom of the page, there are two fields under the "Name" and "Password" headers. Give your new worker a name like "Laptop", or "New Dell". Create a short password. Remember the password for the worker. Then click "Add".
Click "Home" in the navigation bar at the top of the page.
Step 4: Install Java

Most people already have Java installed, but if you don't, follow this step.
1) Go to www.java.com/download.
2) Click "Free Java Download".
3) Click "Agree and Start Free Download".
4) Depending on your opperating system, a different version of the file will download.
5) Follow the onscreen instructions to continue installing the software.
6) Click finish and be done installing. Continue on to the next step to set up a miner.
 Download the BitMinter Client for your operating system under the TOOLS drop down menu.


1) Go to www.java.com/download.
2) Click "Free Java Download".
3) Click "Agree and Start Free Download".
4) Depending on your opperating system, a different version of the file will download.
5) Follow the onscreen instructions to continue installing the software.
6) Click finish and be done installing. Continue on to the next step to set up a miner.
Step 5: Download the BitMinter Client
Step 6: Set up a Miner


Set up the software by linking it to your worker created in Step 3.
"Click Settings" > "Account...". Beside "User Name:" use the
username you created when creating the BitMinter account. Beside
"Worker Name:" and "Worker Password:" enter the worker name and worker
password you created in Step 3.
If the window is small, click the button in the bottom right corner of the screen. Then click the "Engine Start" button beside each of the devices you want to use. For reference, I get about 65 Mhps (million hashes per second). 1000 Khps = 1 Mhps. Test all of your devices, but you should really only bother running devices that get you 25 Mhps or above.
You will also want to change a few settings regarding automation. I leave my computer on all day and all night. I normally turn off the mining as soon as I get home from work (around 6:00) and have the miner start on its own at night incase I forget to start it when I'm done with my computer.
Go to Settings > Options to change these settings. Look at the fourth picture to set it up like how I have it set up. The picture has expainations.
Automated devices are a list of devices that you set so that you can start them on their own automatically when the software starts. I have selected one of my devices as automated so that when the software starts, only that device starts. See fourth picture for more details.
Step 7: Mine!

Let
your computer run while it mines! Running it at night is a good idea as
it will double the amount of money you make. Good luck making money!
Step 8: Spend Your Bitcoins

What good is a currency if you can't spend it? The answer is it's not. There are lots of things you can do. Below is a list:
- Gamble
- SatoshiDice
- Bitzino
- Peerbet
- RoyalBitcoin
- And many more
- Buy various merchandise
- Some online vendors are starting to accept bitcoins as a way of purchasing items
- Buy Coffee (http://bitcoincoffee.com/)
- Trade it for PayPal money
- Mt. Gox Bitcoin Exchange
The last one I want to talk about it Mt. Gox. It is the most common website used to trade (buy or sell) bitcoins for dollars or any other national currency. You can receive this money through PayPal or many other online currency transfer services. I am not going to go through the details of this, but to send bitcoins to anyone or any service, follow the instructions in the next step.
Step 9: Send Bitcoins to Someone

To
use bitcoins, you must send bitcoins to another address. To send
bitcoins, the service will give you a specific address to send bitcoins
to.
Copy this address. Open up your bitcoin wallet. Click on the "Send coins" tab.
Enter the address you want to send the coins to in the "Pay to" field. If you are going to send coins to this person or group multiple times, you can enter a label for this person so that you can find them in your address book again. Enter the amount in the next field (for easy math, remember that 1 BTC is $400). Click send when you are done.
If you just want to practice sending bitcoins to someone, you can test sending them to me. Just send 0.01 BTC to this address 1KHPYQMnHxFoUGK2bCfKFtEuLtH88PYPXG. Good luck!


